Understanding the Oxy Gas Welding Kit
What Is an Oxy Gas Welding Kit?
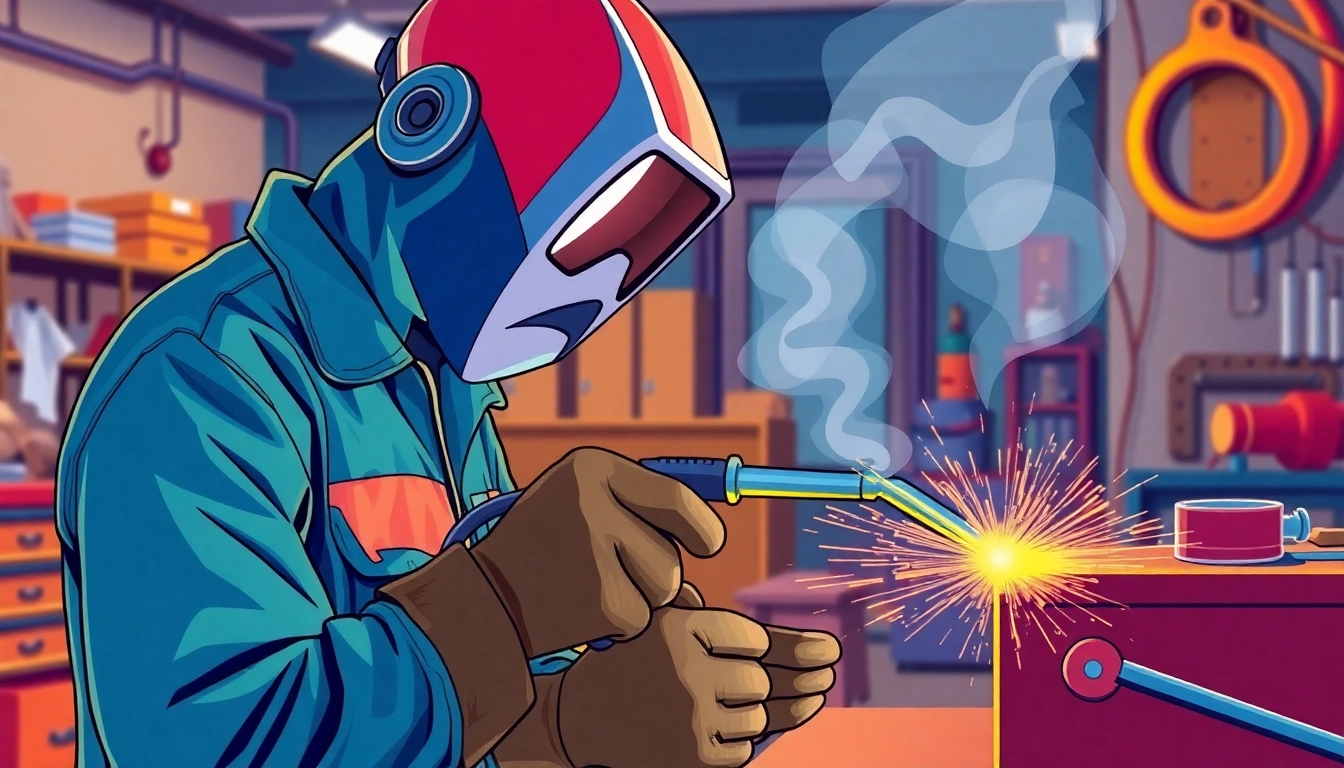
An oxy gas welding kit is a powerful tool set primarily used for welding and cutting metal through the combustion of oxygen and acetylene gas. This method, known as oxy-acetylene welding, utilizes a high-temperature flame — often exceeding 3,500 degrees Celsius (6,332 degrees Fahrenheit) — to melt and fuse metals together. The kit typically consists of several key components that work in unison to facilitate this process.
Components of an Oxy Gas Welding Kit
An oxy gas welding kit generally includes the following essential components:
- Welding Torch: The torch is the primary tool that mixes oxygen and acetylene gas. It allows users to control the flame size and temperature, crucial for various welding tasks.
- Gas Regulators: These devices control the pressure of the gases being released from the tanks, ensuring a consistent flame suitable for welding operations.
- Gas Cylinders: Typically, there are two cylinders in the kit, one for oxygen and another for acetylene. These cylinders must meet safety standards and be regularly inspected.
- Hoses: Flexible hoses connect the gas cylinders to the torch and come in various lengths. They are designed to handle high-pressure gases safely.
- Fittings and Nozzles: These components are essential for connecting hoses to the torch and provide the necessary configurations for different welding applications.
- Safety Equipment: This includes goggles or face shields to protect the eyes from bright flashes, flames, and flying debris.
- Training Manuals/Guides: Often included in the kit, these materials help beginners understand how to safely and effectively use the equipment.
Benefits of Using Oxy Gas Welding Kits
Oxy gas welding kits offer numerous advantages that make them a preferred choice among professionals and hobbyists alike:
- Versatility: Oxy-acetylene welding is compatible with a wide range of metals, including steel, aluminum, and brass, making it a versatile technique for various applications.
- Portability: Most oxy gas welding kits are designed for portability, allowing users to carry them to various job sites or home projects.
- Cost-Effectiveness: Compared to other welding methods, oxy-acetylene welding kits are generally more affordable and accessible for small operations, repairs, and maintenance work.
- Control: Operators have precise control over the flame’s temperature, which enables them to perform delicate tasks that require finesse.
- Repair and Maintenance: The oxy-acetylene method is widely used for repairing machinery, pipes, and vehicles due to its effectiveness in mending metal surfaces.
Choosing the Right Oxy Gas Welding Kit
Key Features to Look For
When selecting an oxy gas welding kit, it’s important to consider several key features:
- Tank Size: Choose the size based on your regular usage. Larger tanks mean longer use without needing a refill, but can be bulkier and less portable.
- Regulators: Ensure they are easy to read and highly durable. Look for models that allow for precise adjustments.
- Welding Torch Design: A good torch should be ergonomic, making it comfortable for extended use. Look for adjustable flames to better suit different tasks.
- Build Quality: Opt for kits made from high-quality materials that can withstand high temperatures and pressures. Check customer reviews to evaluate durability.
- Included Accessories: Additional accessories such as cutting tips or extra nozzles may enhance the kit’s versatility.
Price Ranges and Budgeting
The price of oxy gas welding kits can vary significantly based on brand, components, and features. Entry-level kits can start as low as $99, while more comprehensive kits with advanced features can reach upwards of $500. Here’s a breakdown of typical price ranges:
- Basic Kits: Generally priced between $99 to $200, suitable for do-it-yourselfers and light use.
- Intermediate Kits: Ranging from $200 to $350, these kits may include additional accessories and enhancements for more serious hobbyists.
- Professional Kits: These can range from $350 to $800 or more, offering industrial-grade quality and a full suite of features for professionals.
When budgeting for your oxy gas welding kit, consider not just the initial purchase price but also the cost of refilling cylinders, replacement parts, and additional safety gear.
Comparing Popular Oxy Gas Welding Kits
To make an informed decision, it’s helpful to compare popular products on the market. Here are a few notable options:
- UNIMIG Oxygen Acetylene Gas Kit: Known for its reliability and comprehensive features, this kit is ideal for both beginners and professionals, priced around $300.
- Harris Welding Supplies Kits: These kits offer competitive pricing starting at $99, featuring essential components that are great for beginners.
- Victor Oxy-Acetylene Kits: These are high-end options favored by professionals for their durability and advanced controls, typically costing between $400 and $800.
Researching user reviews and ratings can provide additional insights into the strengths and weaknesses of each kit.
Setting Up Your Oxy Gas Welding Kit
Installation Steps for Beginners
Setting up an oxy gas welding kit may seem daunting for beginners, but following these steps can simplify the process:
- Check Equipment: Ensure all components are present and in good condition. Inspect for leaks or visible damage to hoses and cylinders.
- Attach the Regulators: Carefully attach the regulators to the gas cylinders, ensuring they fit snugly and securely.
- Connect the Hoses: Connect the hoses to the regulators and the welding torch, ensuring correct color coding (red for acetylene and green for oxygen).
- Secure Connections: Use wrenches to tighten connections but be cautious not to over-tighten as this can cause damage.
- Test for Leaks: Use soapy water to check all connections for leaks. If bubbles form, tighten the connection or replace defective components.
- Set Pressure Settings: Refer to the manual for recommended pressure settings for oxygen and acetylene.
- Perform a Flame Test: Open the torch valve slightly to ignite the flame and adjust until it produces a bright, stable blue flame.
Safety Precautions While Setting Up
Prioritizing safety while setting up your oxy gas welding kit is crucial. Here are essential precautions to take:
- Work in a Well-Ventilated Area: Ensure proper ventilation to avoid the accumulation of harmful gases.
- Wear Protective Gear: Always wear safety glasses, gloves, and flame-resistant clothing.
- Check Each Component: Inspect for damages before use and frequently check for leaks, especially in hoses and connections.
- Follow Guidelines: Adhere strictly to the manufacturer’s instructions for setup and operation.
Common Setup Mistakes to Avoid
Awareness of common mistakes can help ensure a smooth setup:
- Incorrect Hose Connections: Color-coded hoses are designed for specific gases. Connecting hoses incorrectly can lead to dangerous situations.
- Ignoring Leaks: Failing to check for leaks can result in hazardous situations. Always perform a leak test with soap and water.
- Improper Pressure Settings: Setting the wrong pressure can compromise safety and effectiveness; always refer to guidelines.
- Forgetting Safety Gear: Not using protective equipment can lead to serious injuries; consistency in safety practices is vital.
Techniques for Effective Oxy Gas Welding
Basic Welding Techniques
Understanding the fundamental welding techniques associated with oxy gas welding is crucial for beginners. Here are some essential approaches:
- Stringer Beads: A basic technique involving moving the torch in a straight path to create a narrow bead of weld.
- Weaving Technique: Moving the torch back and forth to create a wider weld, suitable for thicker materials.
- Circle Motion: This involves moving the torch in a circular motion to ensure even heat distribution when welding.
- Filling Technique: Used for filling gaps. It requires a steady hand and consistent movement to ensure a uniform fill.
Tips for Advanced Welds
For those looking to master advanced techniques, consider the following tips:
- Understand Material Properties: Different materials require specific heat settings and torch angles. Familiarize yourself with the metals you are working with.
- Rectify Technique Errors: Analyze past projects to identify areas needing improvement, ensuring continuous development.
- Experiment: Try out new techniques on scrap metal pieces to gain confidence before working on valuable projects.
- Seek Feedback: Have experienced welders review your work to provide constructive criticism and areas for improvement.
Practicing with Your Oxy Gas Welding Kit
Regular practice is crucial for honing your skills. Here are some suggestions for effective practice:
- Use Scrap Metal: Start with scrap pieces to work on your welding techniques without the pressure of using valuable materials.
- Document Your Practices: Keeping a record of your sessions can help track your progress and identify skill areas that still need work.
- Join Workshops: Participating in welding workshops can provide hands-on experience and professional guidance.
- Implement a Buddy System: Practicing with a partner allows for sharing techniques and learning from one another.
Maintenance and Care for Your Oxy Gas Welding Kit
Regular Maintenance Tasks
To ensure your oxy gas welding kit operates effectively and safely, following regular maintenance tasks is essential:
- Inspect Hoses: Regularly check hoses for wear and tear. Replace hoses that show signs of damage immediately.
- Clean the Torch: After each use, clean the torch nozzle and tip to prevent clogging and ensure optimal welding performance.
- Tighten Connections: Regularly check and tighten all connections to ensure there are no leaks.
- Storage: Store your kit in a dry place away from direct sunlight when not in operation to prevent damage.
Inspecting Your Equipment
Frequent inspections of your equipment can prevent accidents and ensure longevity:
- Gauge Readings: Check gas gauges regularly to avoid running out of fuel unexpectedly.
- Visual Inspections: Look for signs of damage, corrosion, and other issues that can affect performance.
- Functional Tests: Periodically test the equipment to ensure everything is functioning as it should, particularly the regulators and the torch.
Extending the Life of Your Oxy Gas Welding Kit
To maximize the lifespan of your oxy gas welding kit, consider the following strategies:
- Proper Usage: Follow all guidelines and instructions to avoid unnecessary wear and tear.
- Timely Repairs: Address any issues as soon as they arise to prevent them from worsening and causing more significant problems.
- Use Quality Components: Invest in high-quality replacement parts and accessories for your kits to ensure performance and safety.
- Educate Yourself: Stay informed about the best practices in welding and maintenance through online resources, tutorials, and workshops.


Leave a Reply